
Diary
The Diary module allows you to keep track of your daily job schedule and schedule future work for the next day, next week, or next month, as applicable. You can also record what jobs have been paid for and which ones are outstanding.
Viewing and Printing Your Daily Worksheet
The Diary screen allows you to view your worksheet on a daily basis, prepare your jobs ( quote, invoices and payments), and reschedule jobs where required. You can also print a run-sheet or daily Diary.
To open the Diary, click on the Diary option in the top left-hand corner of the main screen, below Dashboard. You can also select the display by the current Day, Week, or Month.
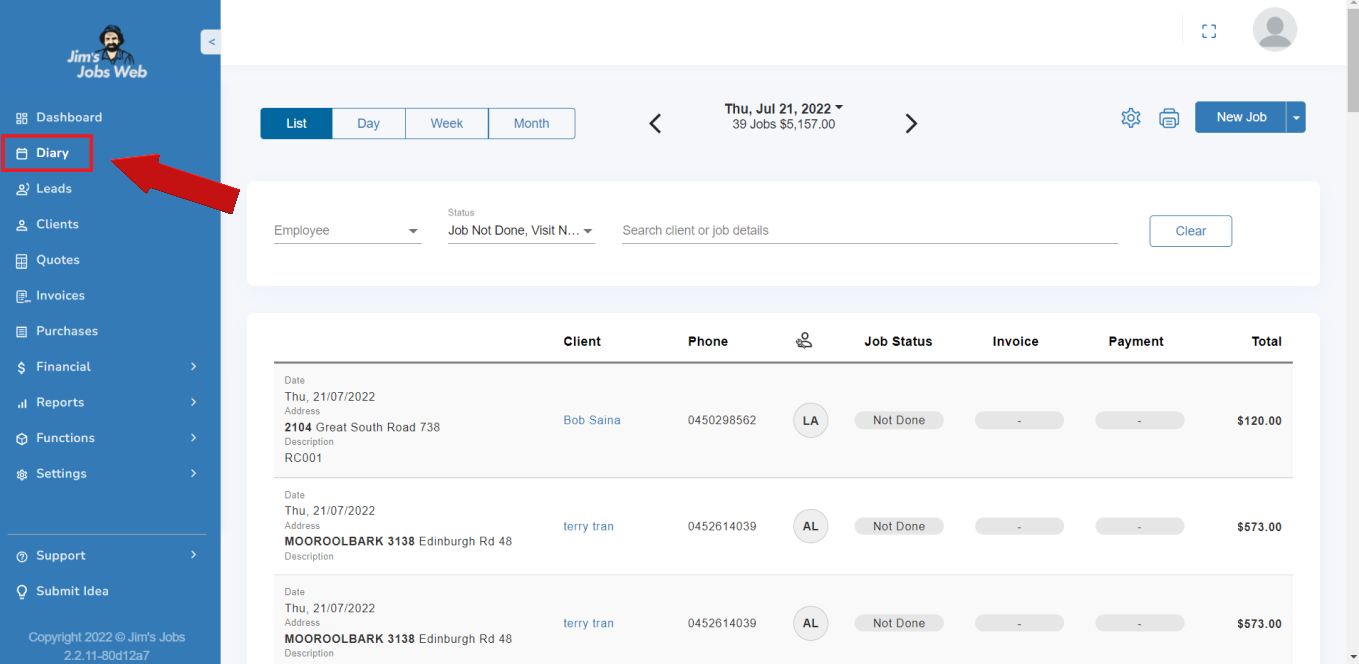
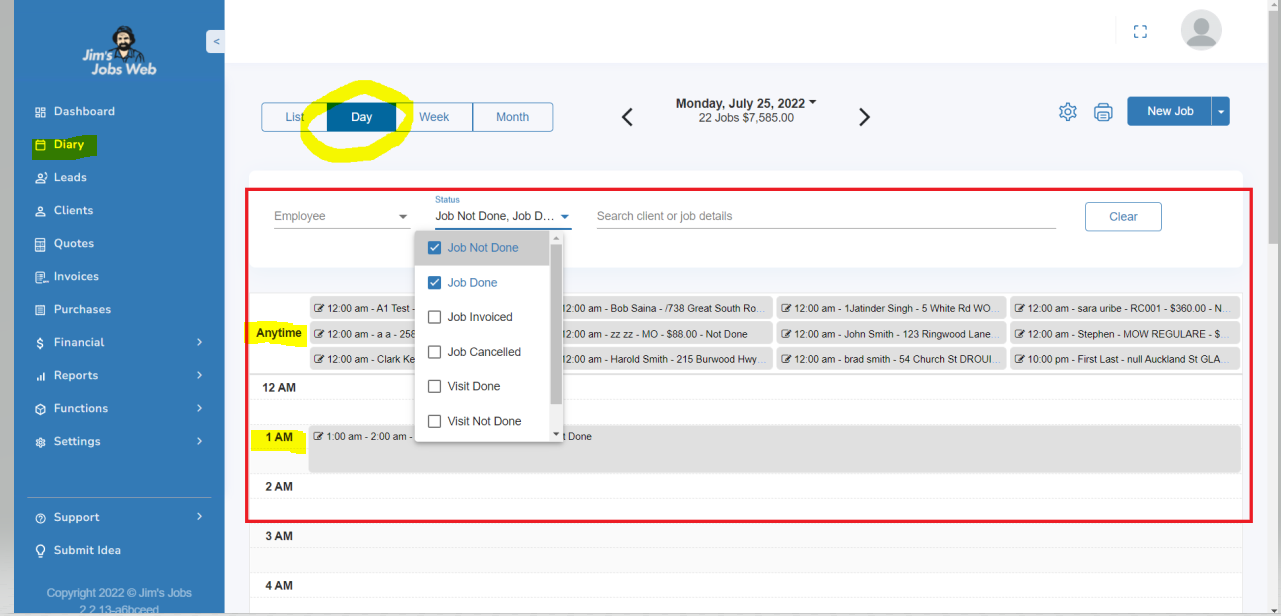
There are different ways to find jobs by:
- Employee
- job status
- Search. Type in the “Search client or job details” field.
See different boxes 1,2, and 3 below.

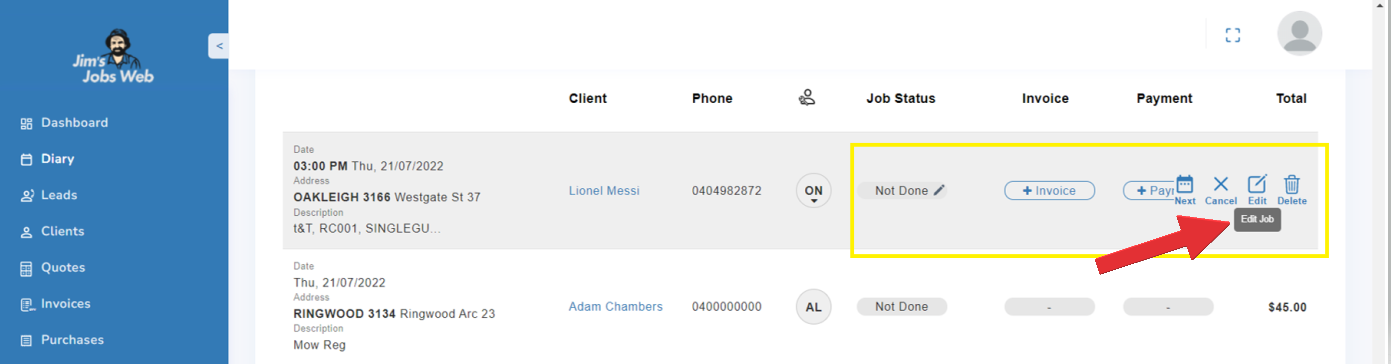
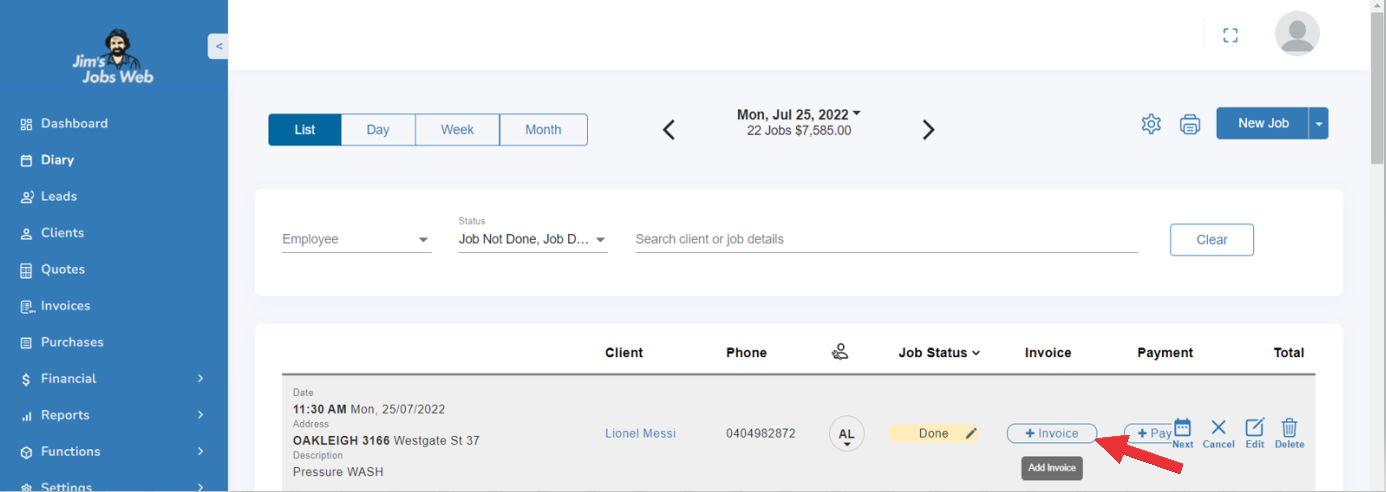
You can update the job status, and add invoices and payments from a client. You can also use the action buttons to invoice a job, include a payment, mark a job as done (no invoice or payment), cancel a job, or reschedule a job.
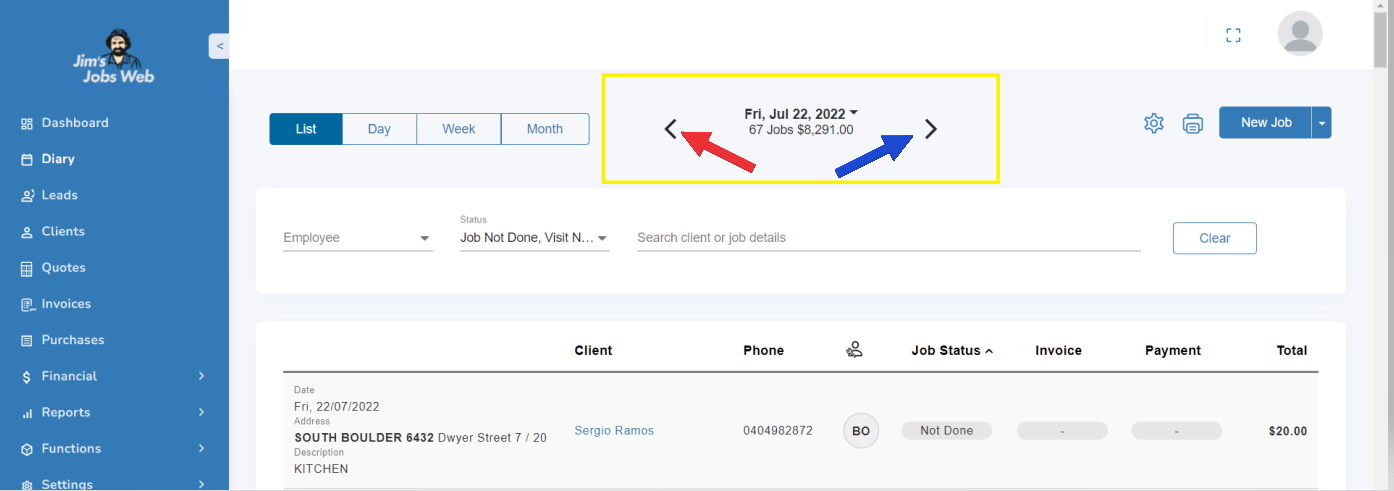
To view a specific day, other than the current date, go to the arrows from the current day, so the left arrow goes to days in the past (see red arrow) and the right arrow goes to the future (see blue arrow).
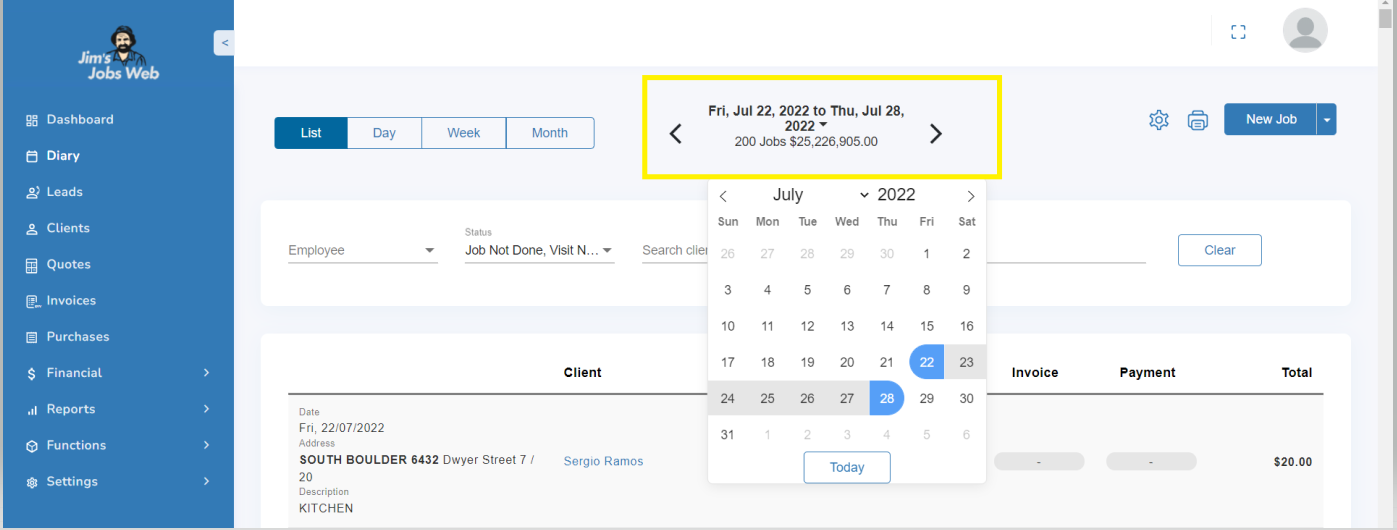
To view a date range, go to the current date that is in the middle on bold (1) and select your preferred From / To date (2). There is a popup calendar with the current month.
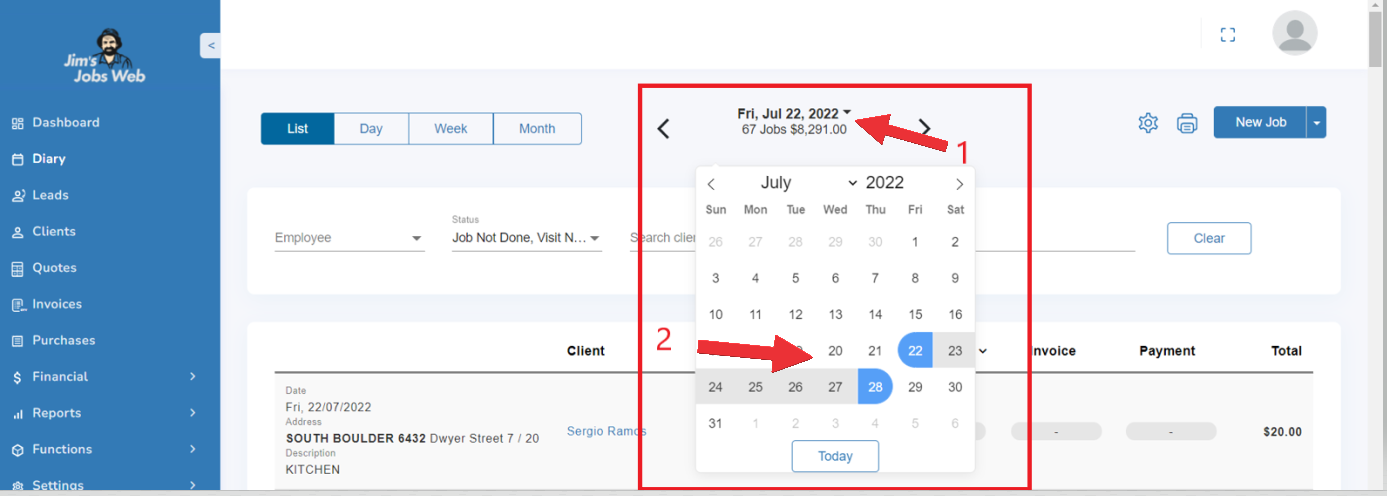
An update of the number of jobs and their value will come up on the top middle of the screen.
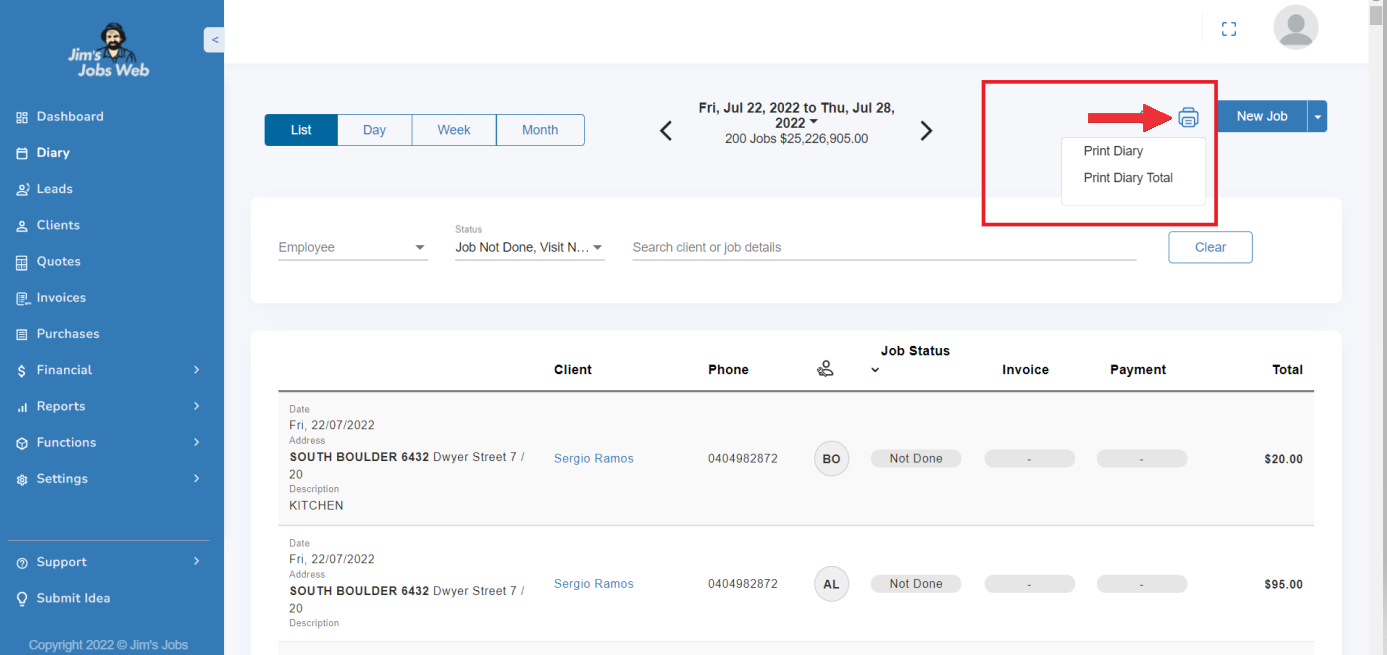
To print out your run sheet, on the top right go to the printer and you can click Print Diary or Diary total. The print-out is in a format suitable to take with you on the road and allows you to tick off jobs as they are done or to make notes for future work.
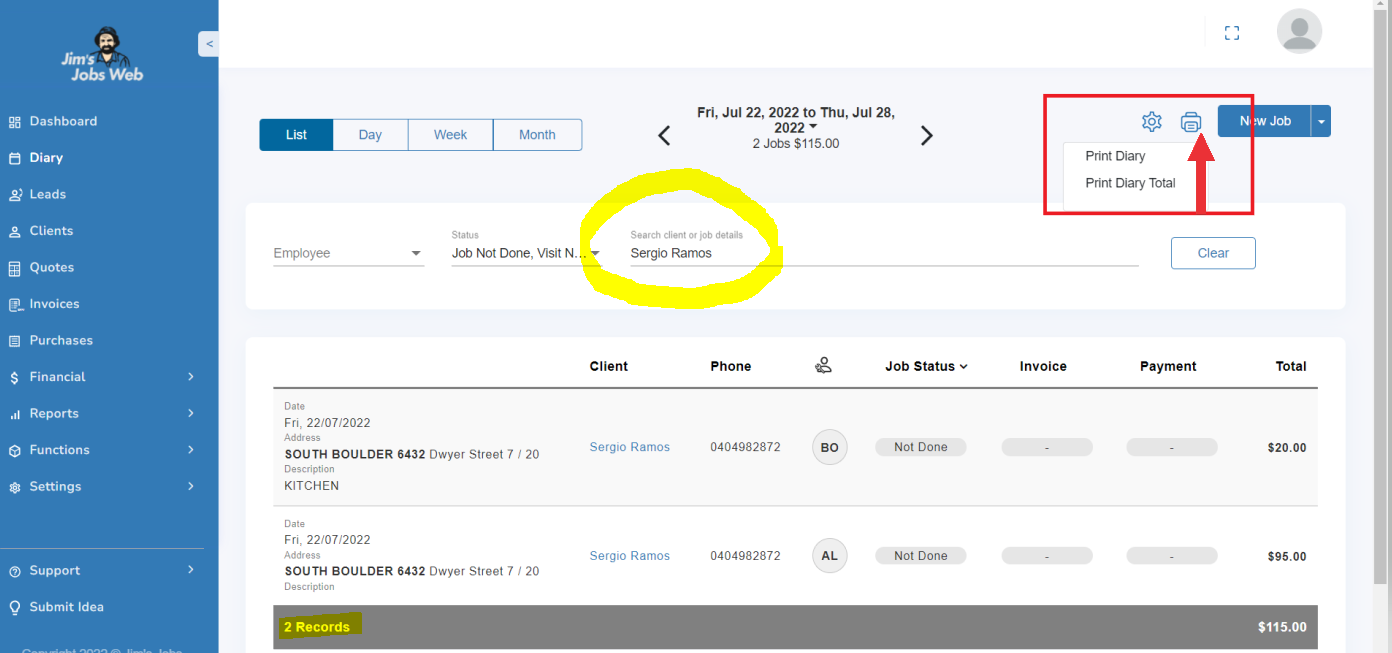
To print for a client just select the name of the employee from the selection or type their name in “search client or jobs details”.
Jobs Organization At The End Of The Day
At the end of the day, you should always record what happened to each job – whether they paid you, if they didn’t pay you, or if the job was postponed/canceled or amended for whatever reason.
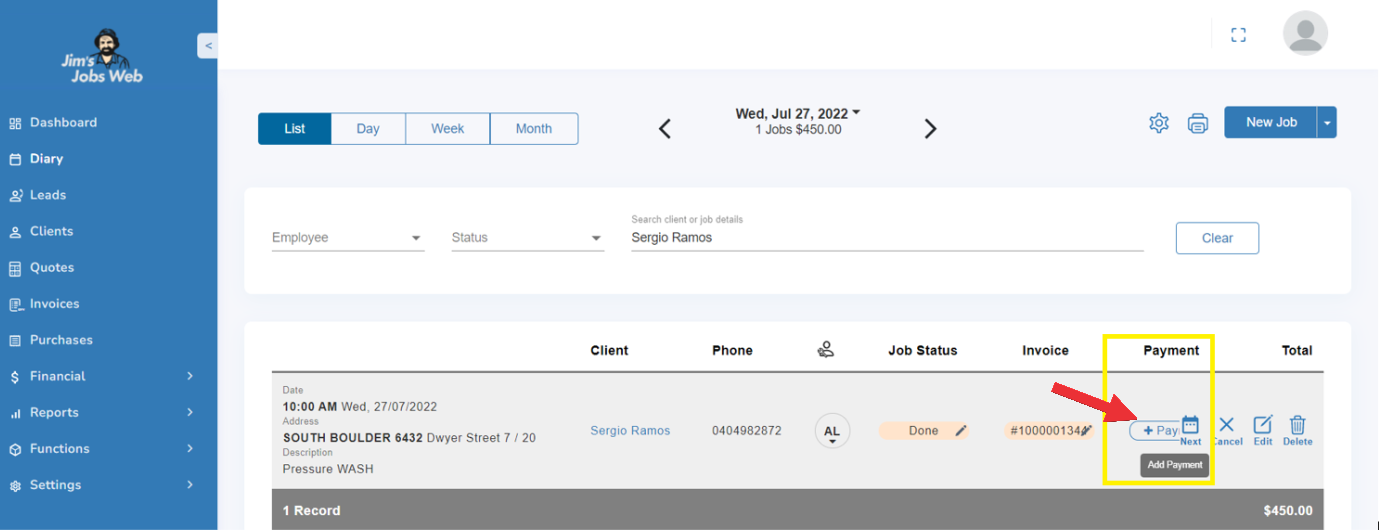
For example, invoice a Job using the + Invoice button as it is shown below.
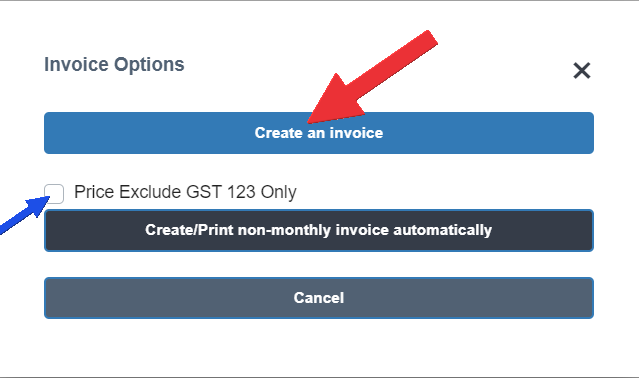
You can create the invoice and tick if it takes GST ( Tax).
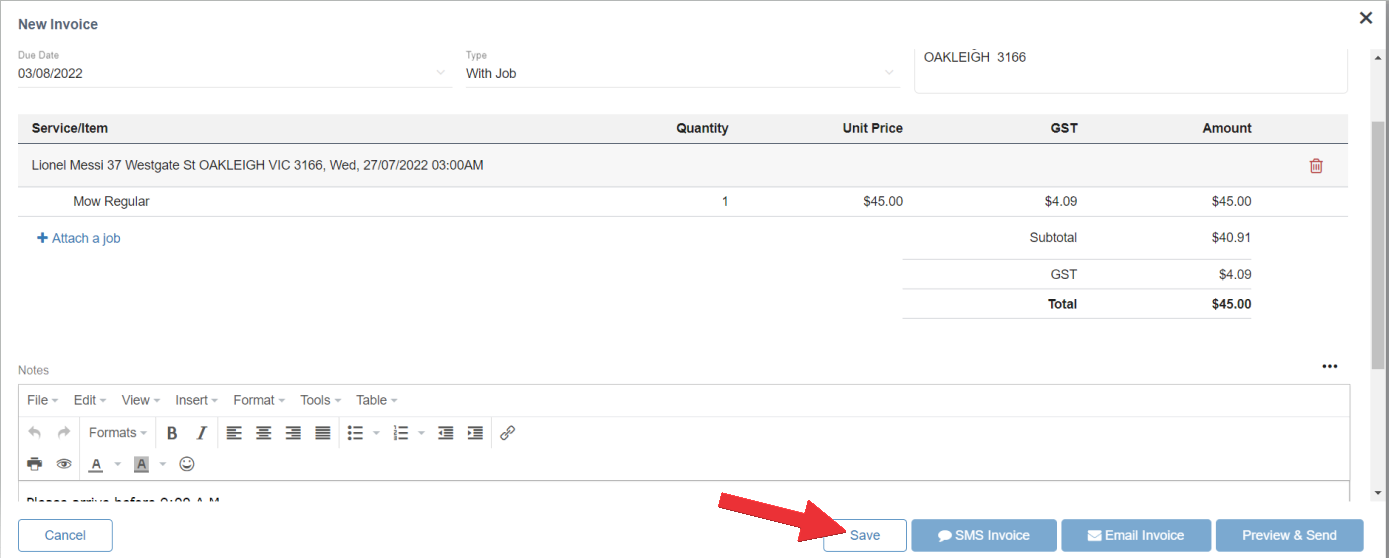
You only need to click on the save button and then the invoice is going to be generated with its number. In addition, you can update, SMS the invoice, email it or preview it and send it with their respective buttons.
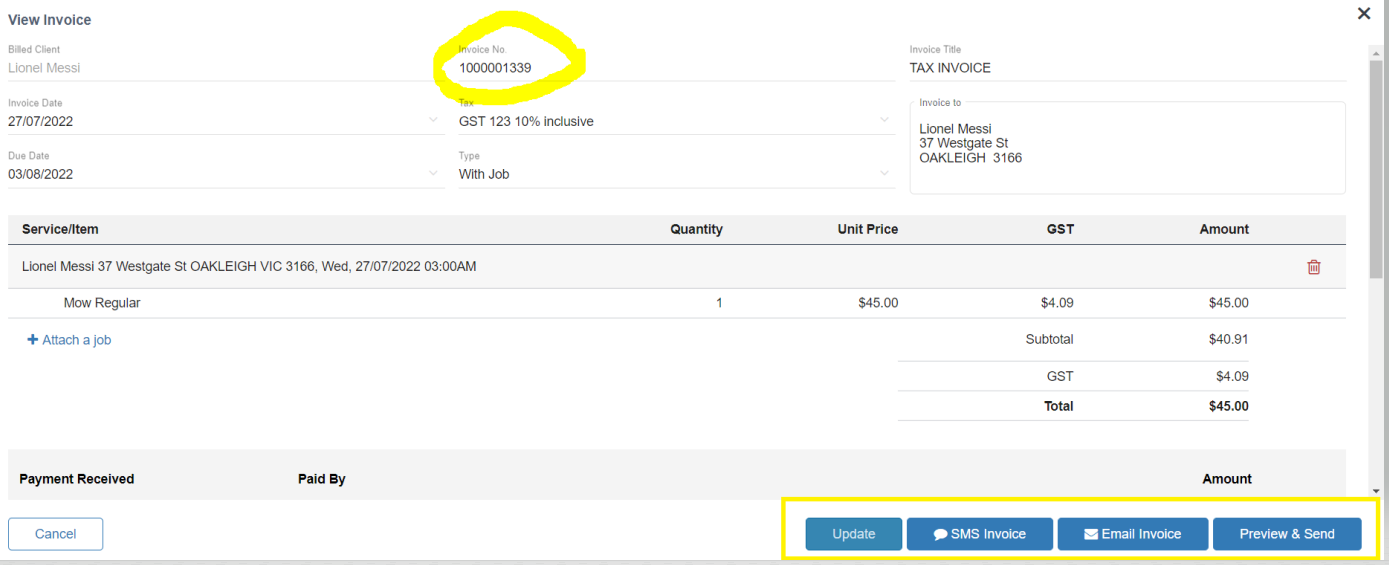
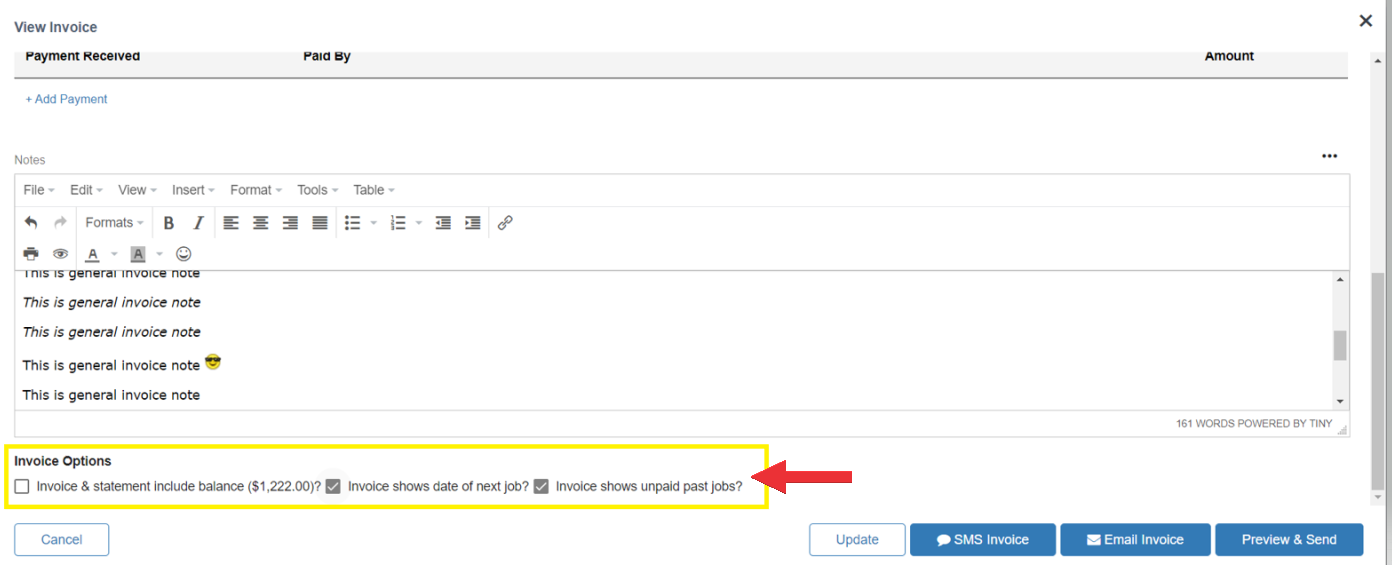
To get different invoice options you have to scroll down and find the following to tick:
- Invoice & Statement include balance
- Does the invoice show date of the next job?
- Invoice shows unpaid past jobs?
See the below screenshot inside the yellow box.
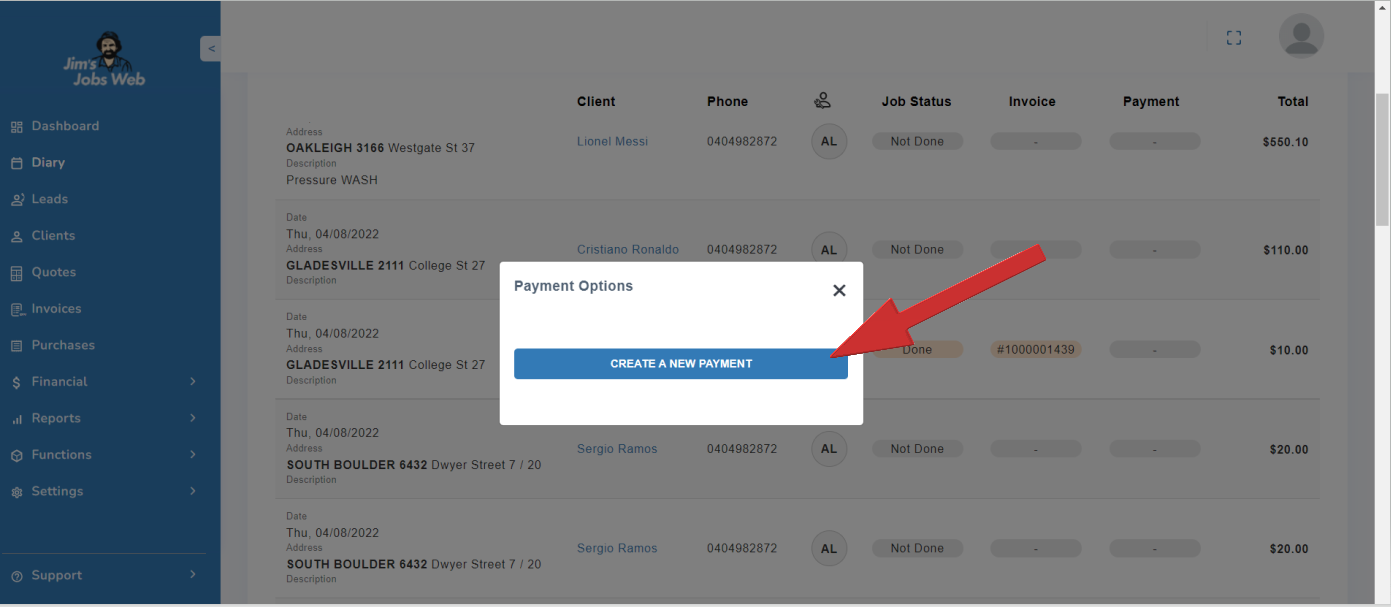
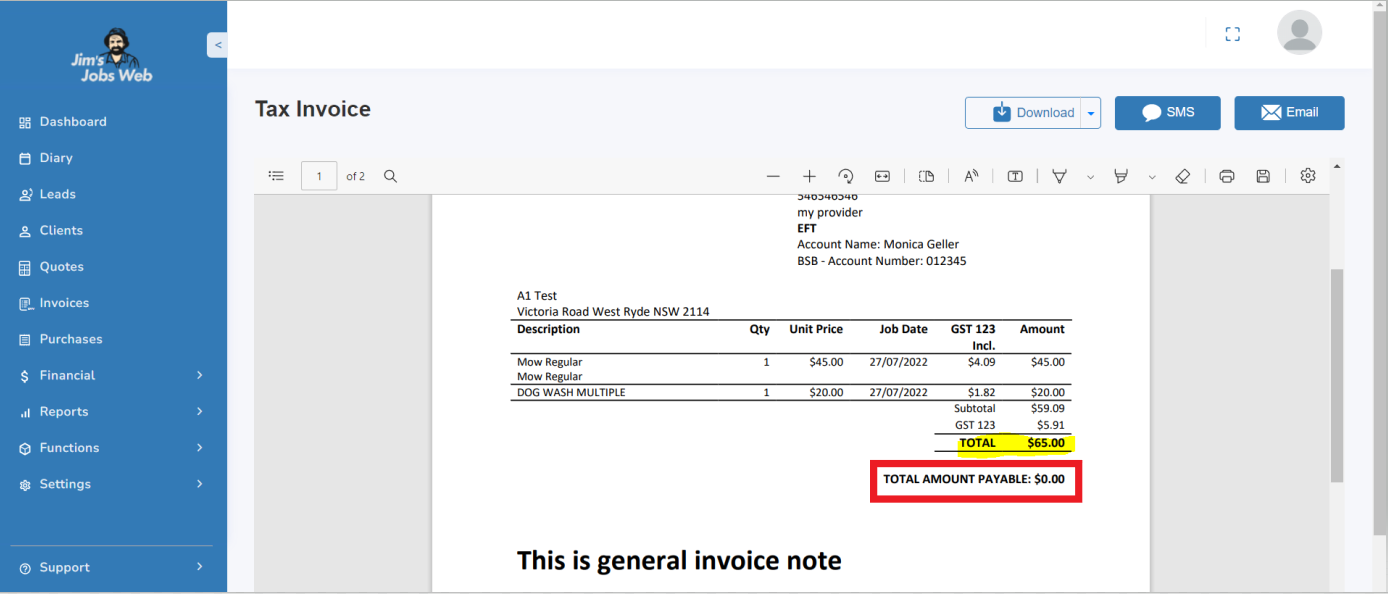
Once the invoice is created, you simply add a payment to a job.
And just click on the save button.
Providing that the invoice was paid, the total amount payable is zero.
You should always record if any extra work was done or is planned to be done in the future.
To record any extra work done, or to change the job status, select the appropriate job in the diary for that client, then double-click that job in the diary or select the Edit Job  action icon.
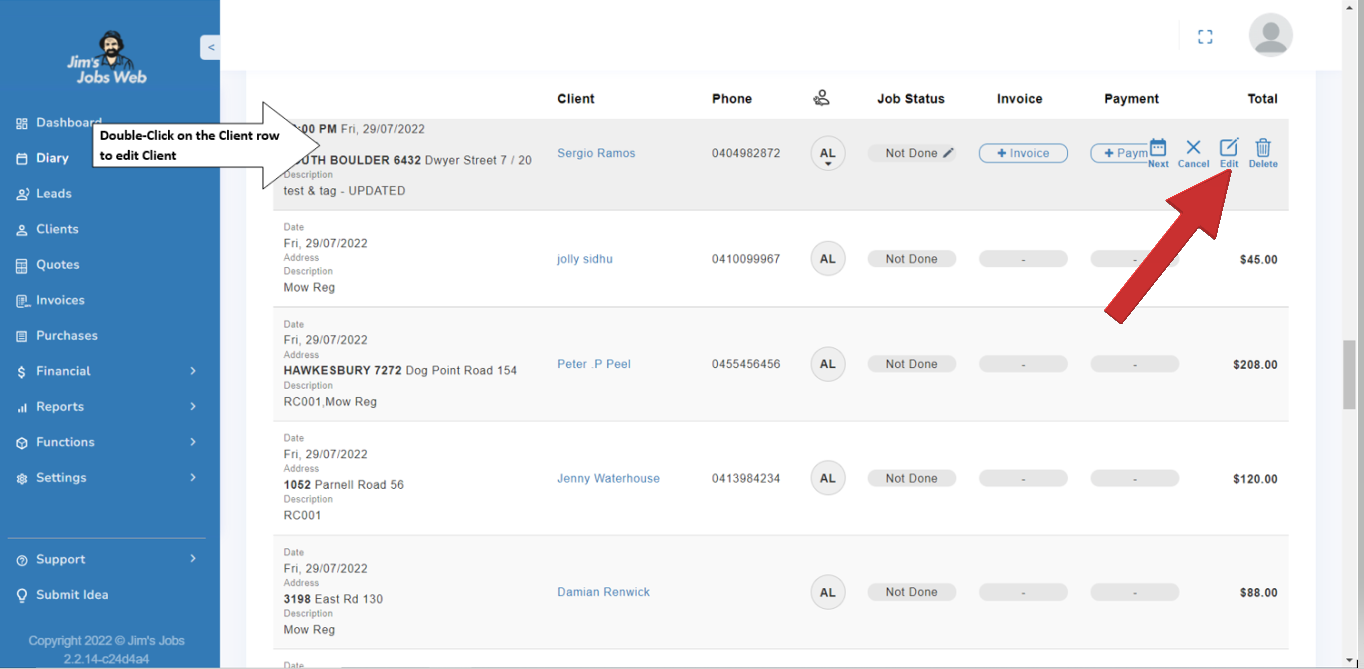
This loads the Edit Job page where you can amend the Job details.
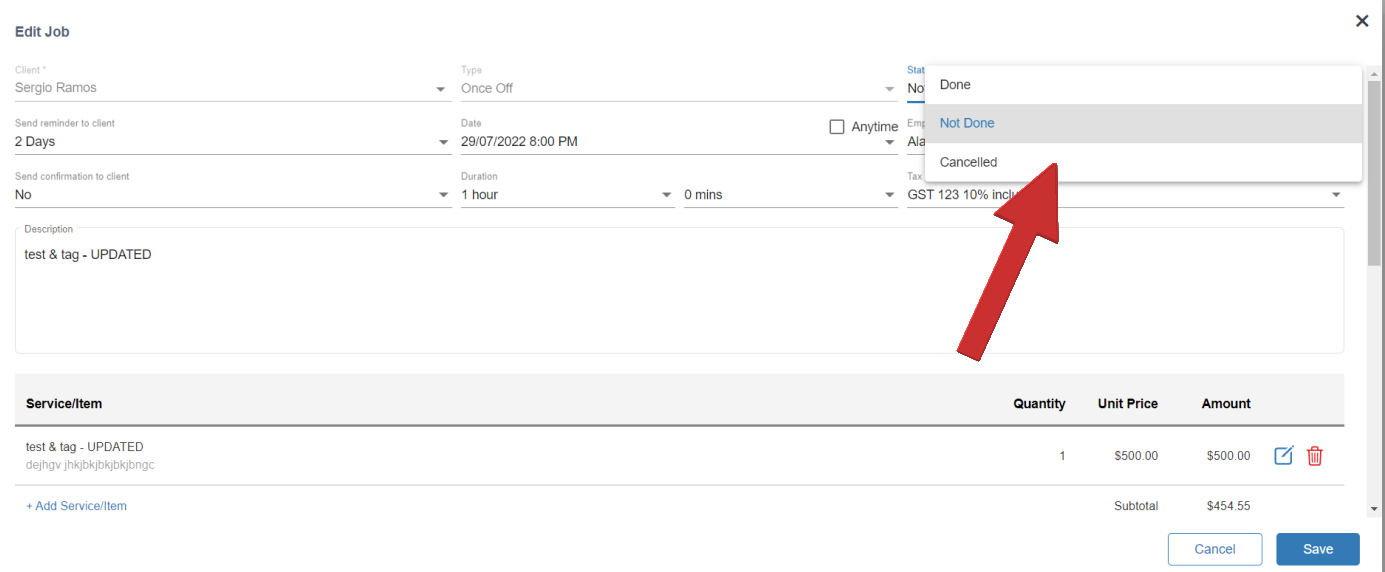
Firstly, set the Status – was the Job Done, Not Done, or Cancelled?
Marking a job as Done, or Cancelled will move the job from the Future Jobs tab to the Past Jobs tab in the Clients view.
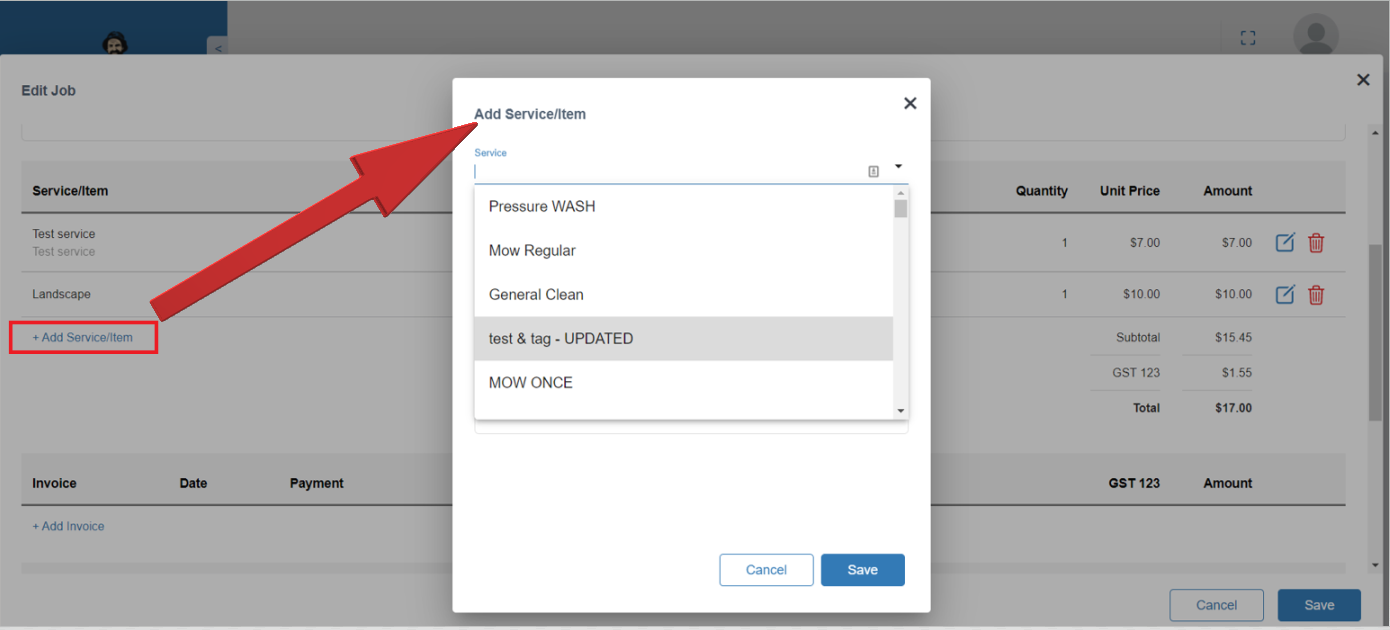
If the job was done, review the services on the job and record if any extra work was done. You can Add Service to add in additional services that were provided, and specify the price. You can do this several times if you provided multiple additional services. A pop-up message with a scroll-down bar with the different services supports this task.
You can also change any other details of the job such as price, date, or notes. You then need to specify whether the job was Paid or Uunpaid.
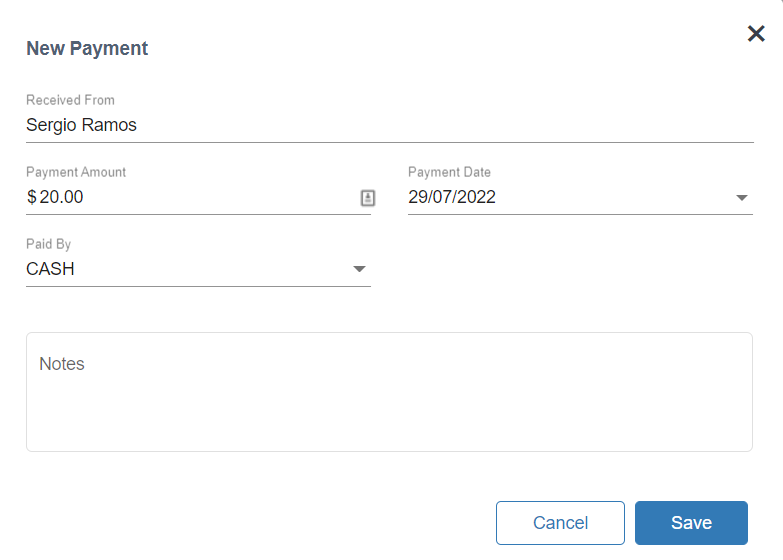
If you did a job, and the client paid you on the spot for it, click on Add Payment. This allows you to specify the details of the payment.
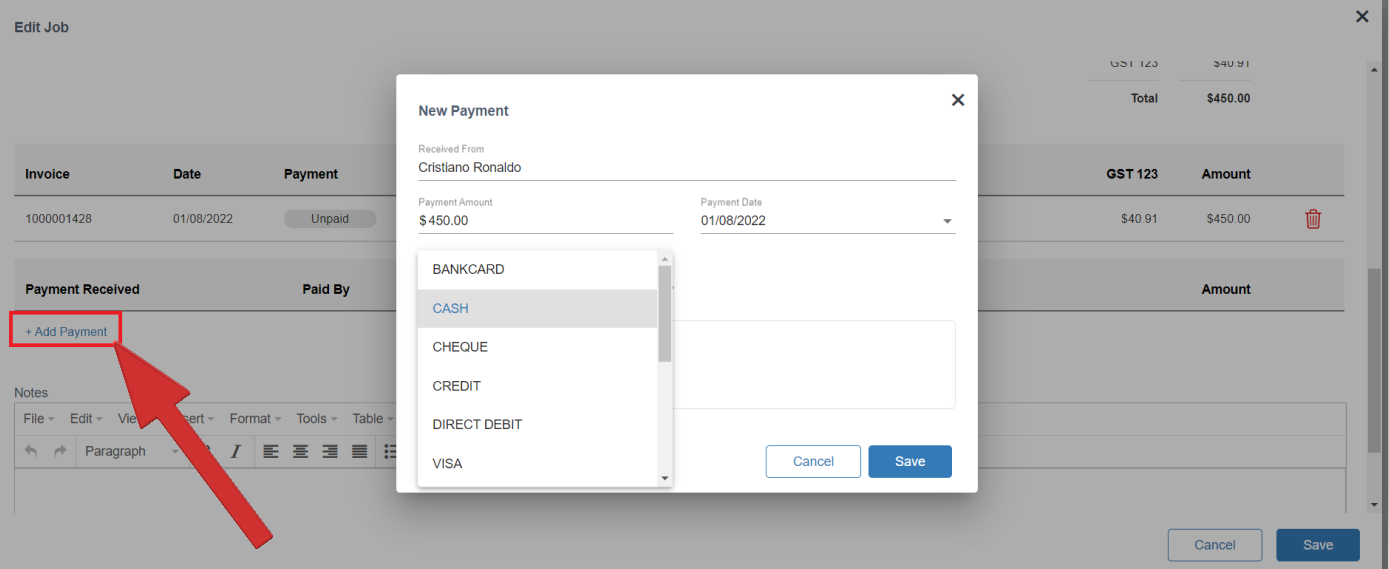
Select the Update button to save any changes you make.
You will still have to enter the new cheque details for cheque payments.
If the client however was not home or did not pay you on the day, when you change the job status to Job Done go straight to Update, and do not click add payment. Jim’s Jobs will automatically record the amount as outstanding against the client when you date.