Adding New Clients (including Pickups)
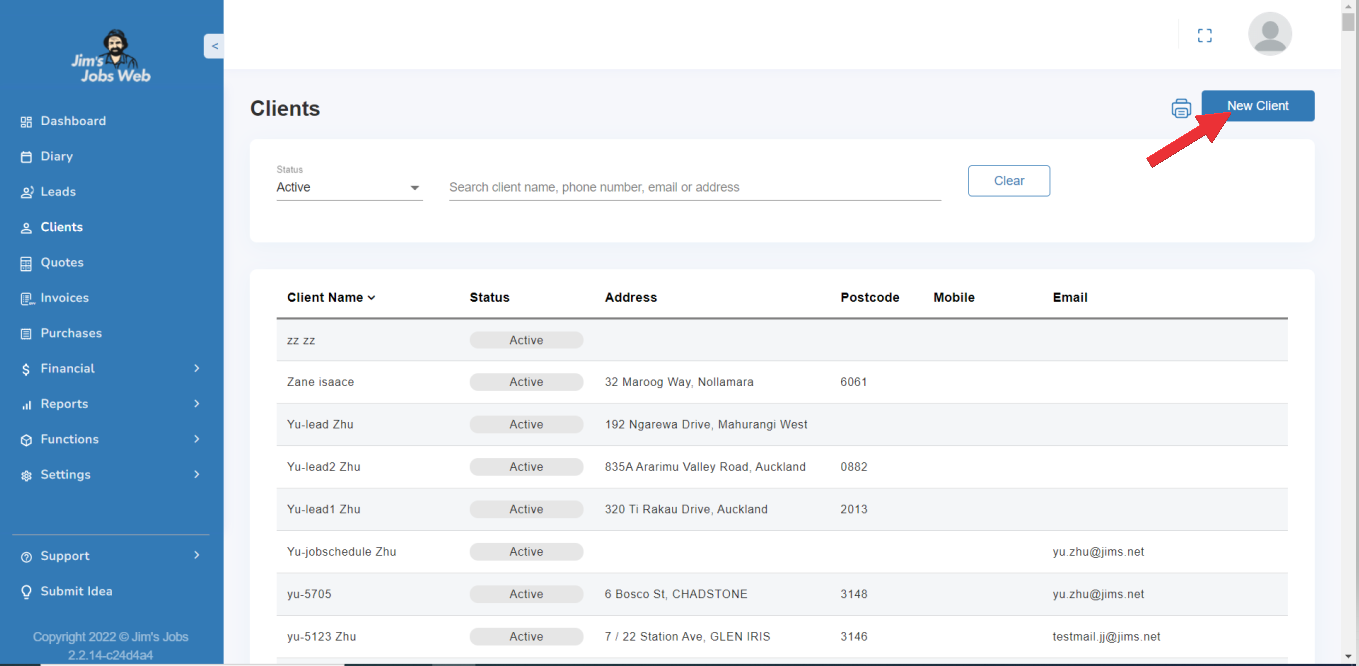
To add a new client, go below under Dashboard on the left there is the Client module. Click on the client and top right you will find the New Client button
This will display a blank client screen, where you can type in the relevant personal and contact details, when you serve them, and how you want to bill them.
This functionality is described detailed further in this document.
When you add a pickup in Jim’s Jobs, it will push through to Jim’s Online and Xero (if applicable). There is no longer a need to enter them into Jim’s Online.
Adding addresses to your clients/pickups using Google
In Jim’s Jobs, you can add your client’s address using Google’s API if the address already exists. This means that you only enter the address on One field and Google pops up with a list of addresses while you type and if the address is on the list, you just select the specific one. Please go through the video attached using Jim’s Jobs Web
If you prefer using Jim’s Jobs Mobile, on your phone, the same feature is available. Please go through the video below attached.
Adding addresses to your clients/pickups manually
If your client’s address does not exist in Google, then you can add manually his/her address field by field. You need to make sure you filled out the following fields:
- State/Country
- Suburb
- Postcode
- Street
- Street No
- Unit No ( If applies)
When you use Jim’s Jobs Web, there is a dropdown menu when you click on ” Enter Manually”, please see the video below.
If you prefer using Jim’s Jobs Mobil on your phone, please go through the below video.
Finding Existing Clients
If you wish to view or edit an existing client, first click on the Clients module. This will bring up the main screen which will display all the clients you have previously entered and saved.
By default, Active clients are displayed. You can change the filter to display other client filters
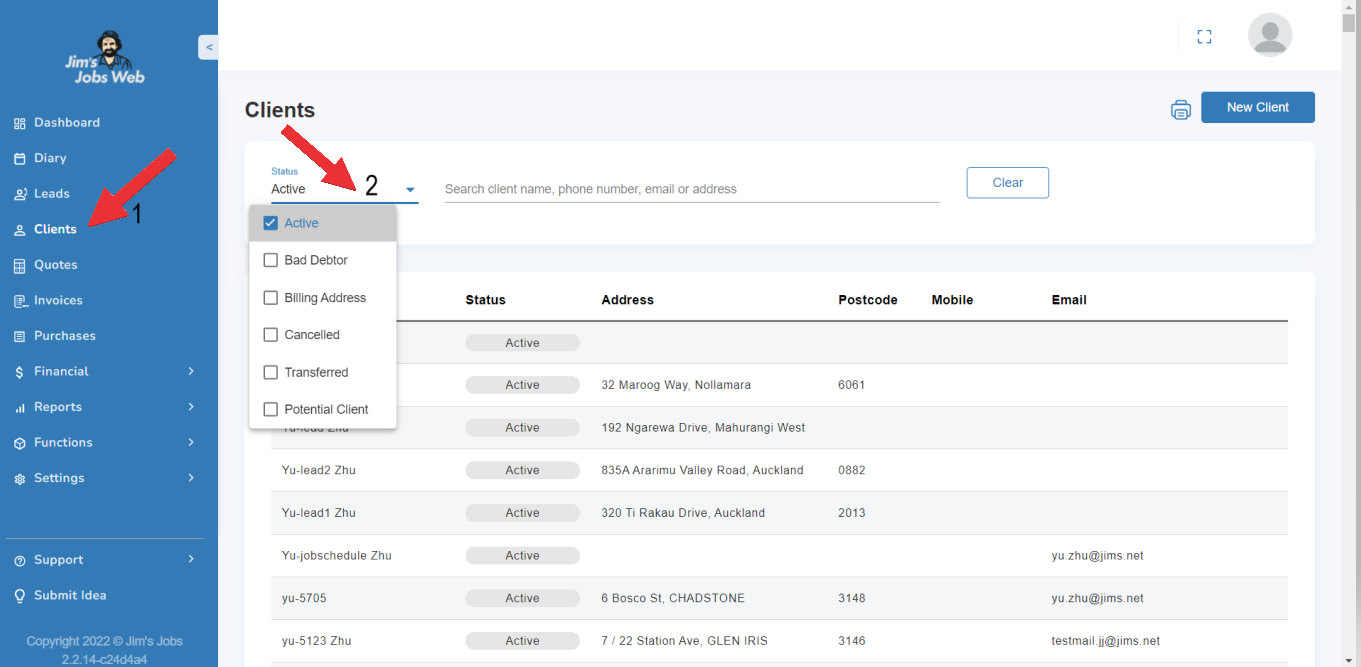
To search for a client, select the type of client you are looking for with the Select Clients Status to list filter. You can select by Active client, Bad debtor, Billing address, Cancelled client, Transferred client, and Potential Clients (clients you are not servicing yet) or All clients (if you are not sure what the client status is).
Search using your browser
You can sort your client list by clicking the arrow 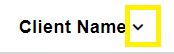 next to the Client Name field to sort ascending or descending alphanumeric order.
If you want to locate a client within the list you have filtered, make sure you have set the Records Per Page to ALL. You can then use your browser to search Control-F function to find the client in your list by any data visible (e.g. Client name, address, telephone number)
For example, if I was looking for my client called Lionel Messi, I would use Control-F in my browser to search for those keywords and the browser will highlight where they are found in my client list (in any field):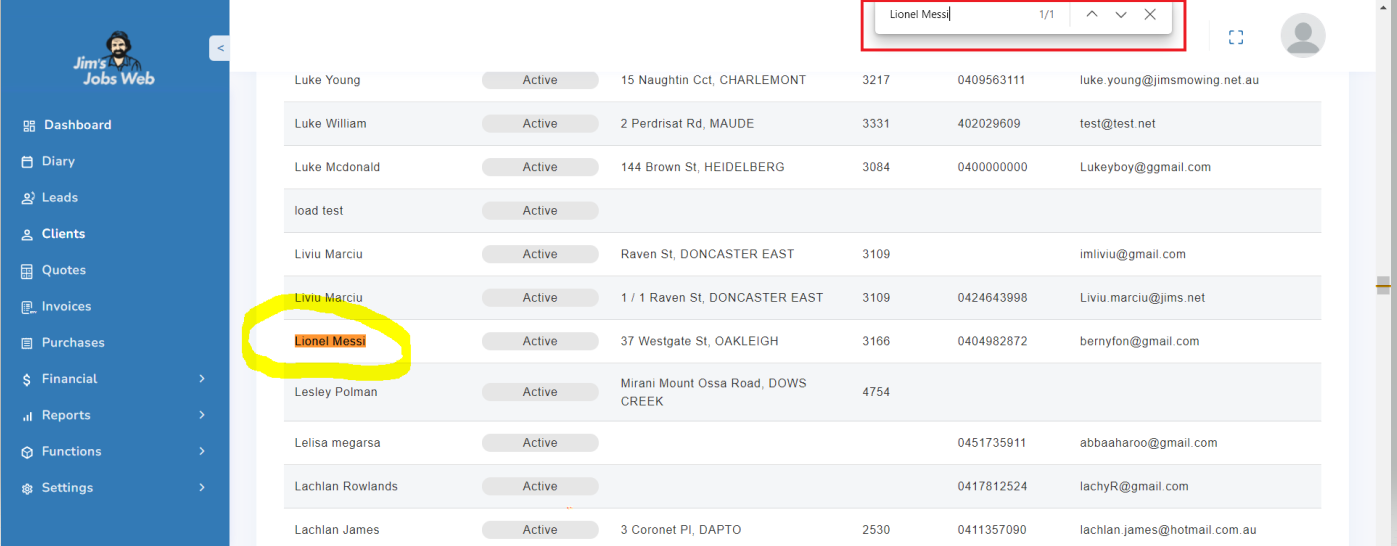
Search using the on-screen search function.
You can search for a client using one of the available search fields:
- Client name
- Phone number
- Email,
- Address

Client Details
Note: By default, when emailing a quote or invoice, the “To” field shows what is entered as the client’s Display Name under the client’s details page. By default, it’s the client’s name but you can change it to whatever you like.
To view a client’s details, double-click on the client (anywhere on the row), or click the Edit Client action button.
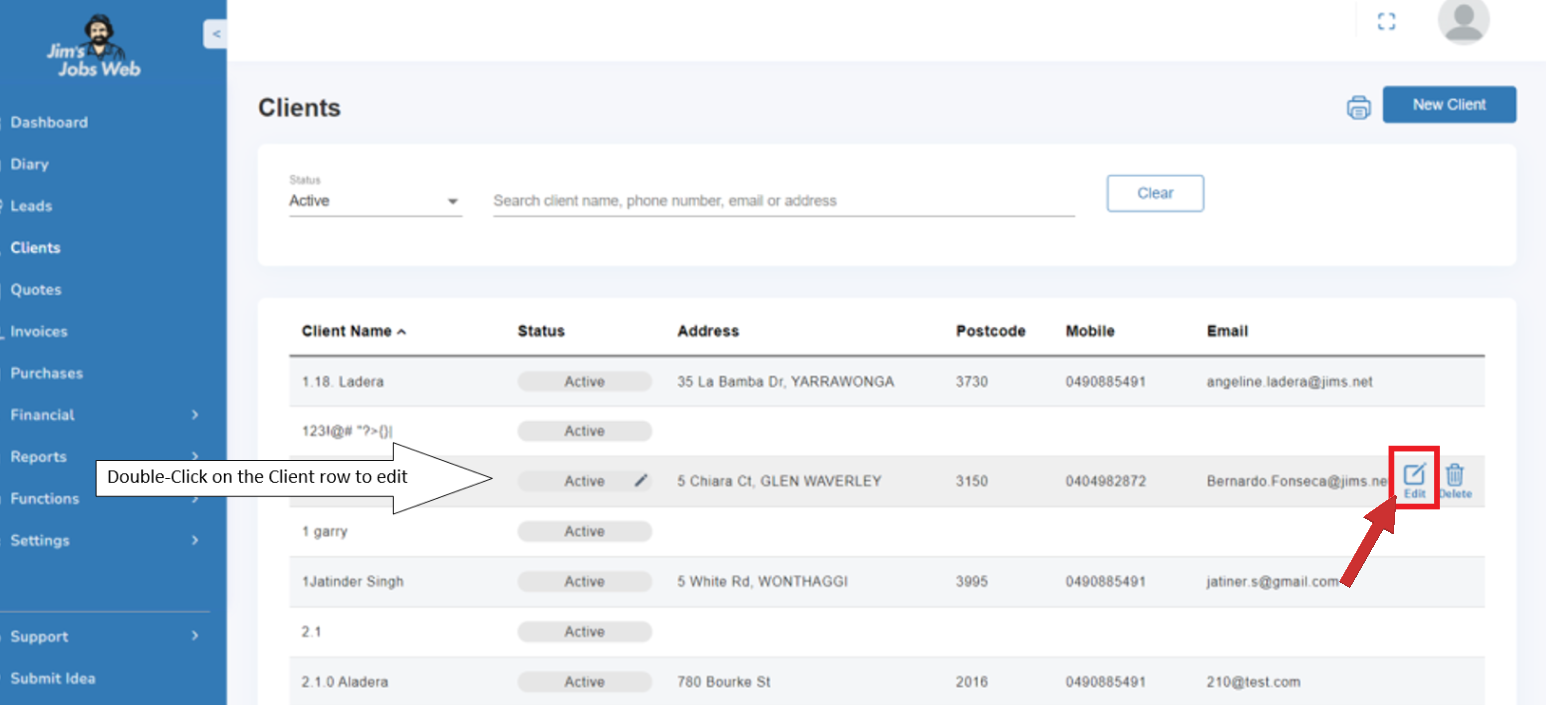
The Client details area contains the client’s status and current contact information, and an area for general notes about the client. Once you enter First Name and Surname, Display Name auto-populates.
Use your scrollbar or mouse scroll to see the Diary notes(will be displayed on the Diary printout) and File notes(will be displayed in Client details) below the Email/Fax field.
You can edit any of the client details, including the Client Status:
| Status | Meaning |
|---|---|
| Active | This means you’re doing work for them. Most of your clients will be active. (Whether they are regular or casual is specified under Services and Scheduling – section 2.4) |
| Bad debtor | This client isn’t paying their bills, and you likely don’t want to schedule any more jobs for them. |
| Canceled | You have serviced the client in the past, but they’ve since canceled the service. These clients don’t normally appear on your client’s list – if you want to access them go to the Clients screen and select client status Cancelled. Once the client is canceled, all the clients’ NOT DONE jobs will be deleted. |
| Billing address | This client may be a corporate client or a private rental property owner, where you service several addresses but just bill the one address. Or, it may be in the system because you send an account to a different address to your service address (ie. PO boxes, etc). |
| Transferred | The client is now being serviced by another operator. Once the client is transferred, all the clients’ NOT DONE jobs will be deleted. |
| Potential client | The potential client is a lead contacted |
By typing the address, note that this information is validated to ensure that the Address conforms to a valid address in FMS.
Otherwise, for adding a pickup to FMS (Jim’s Online), please use Enter Manually to add a valid address. For this reason, you will need to enter the details in sequence:
- State – select from the dropdown.
- Suburb – you can start typing in the first three letters of the Suburb you are looking for, and then select from the dropdown list that will be populated with options matching your data entry.
Suburbs are validated against the State that has been selected, to ensure that the address will have a valid State/Suburb combination. - Postcode – this is displayed on the screen based on the Suburb you have selected and is not editable. This is to ensure that valid Postcodes are kept in Jim’s Jobs, based on State/Suburb entry.
- Street name – as per the Suburb, you can start typing in the first three letters of the street name you are looking for, and then select it from the dropdown list. Only valid Street names for the State/Suburb combination will be available for data entry.
- Street no – enter the street number (this is a required field).
- Unit no – enter the unit number or leave it blank if not required.
To Save any changes you have made to Client details, use the Save button on the blue button.
By adding in a client in Jim’s Jobs, you will automatically save this client back to FMS, so that any new leads for this client should not trigger a lead fee.
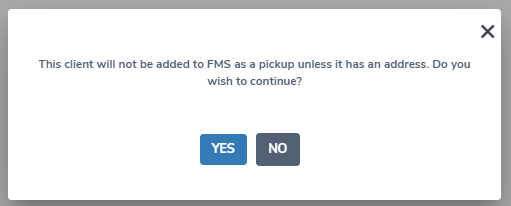
Very important: a client will only be saved back in FMS if it has a valid address.
If you choose to not add in an address for a client, you will be warned that this client will not be saved to FMS.
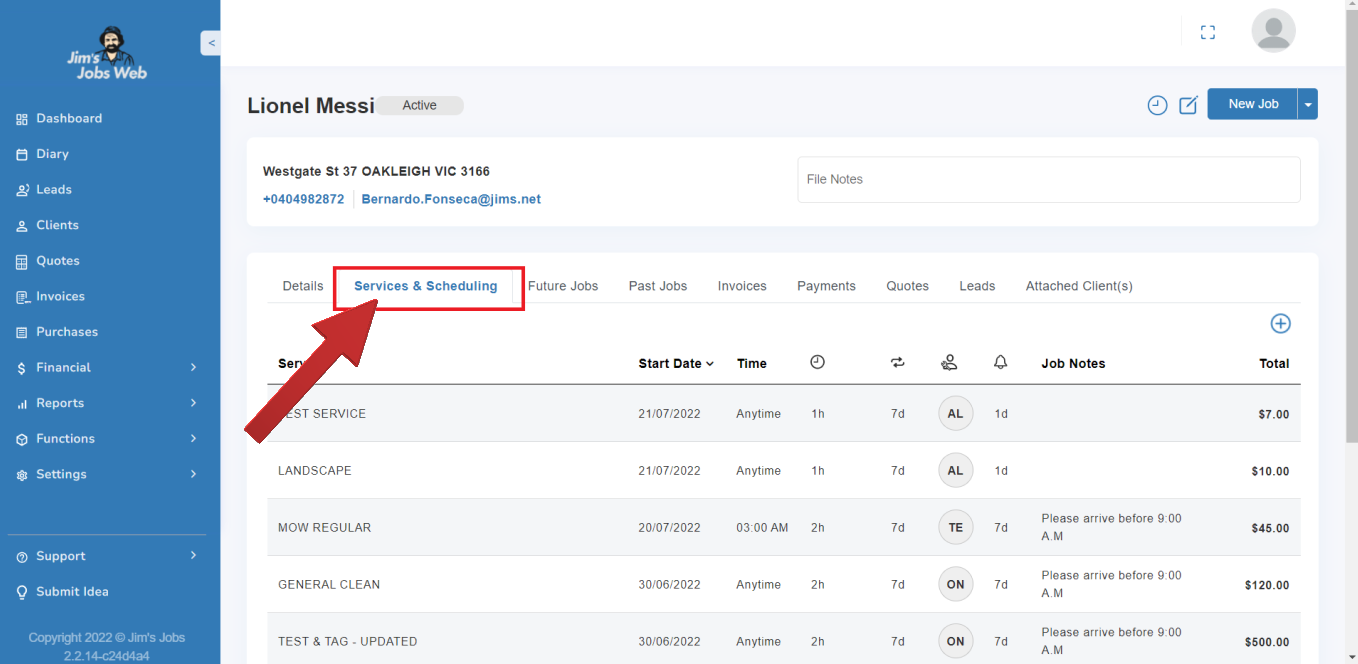
Services and Scheduling
Information about a client’s schedule, servicing, regularity, and pricing is accessed through the Clients screen under the Services and Scheduling tab.

You can specify which service(s) you are providing to a specific client, how much you normally charge them, and how frequently you will be doing those services for them.
Services
When selecting the service you wish to schedule, the list of services is displayed in two sections:
- Custom Services
These services are ones that you have entered in yourself, in addition to the Standard Services provided by Jim’s Group. - Standard Services
These services are provided to you from Jim’s Group as the standard services in your Division.
Some of these services are ones for which you will receive Leads, as these services are assigned to you in FMS.
Add Regular Service, casual, or quote only
If the client has requested service should be done regularly (e.g. once a week), select Regular as the job type on the service. You can then specify the date of the first job (Start date), and also how frequently they want the job done.
A new feature is the ability to specify an End date. This is defaulted to the number of days to auto schedule ahead (in your Setup | Miscellaneous settings page).
For example, if you have set 60 days to auto schedule ahead in your diary, the End date will be set to 60 days after the Start date by default. You can change this to be any date on or after the Start date.
This allows you to set, for example, the date to the end of a season, if your service is seasonally set.

Add Casual Service
If you’re not going to service the client regularly, you can specify the job type as Casual instead. To add in a once-off job, specify the date of the job only (i.e. there is no need for a frequency setting).
Main Service
By default, the first service you add in for a Client is the main service.
Adding a Service that is to be done at the same frequency as the main service
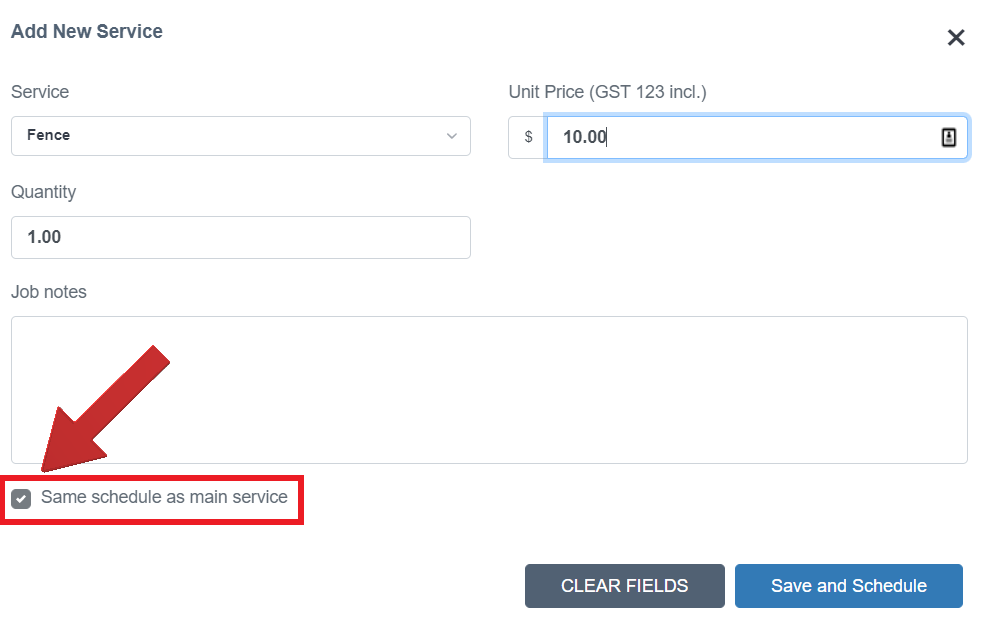
Occasionally, the client may have requested several services to be done. If so, click the button “+ Add New Service”. You can then enter the details of the extra service. Usually, this other service will be done at the same time as the first one and will have the same schedule as the first service selected.
Tick box the same schedule as the main service to schedule these two services on the same days in your diary.
Booking Confirmation and Reminder SMS
While creating a service, after selecting the Service and Job Type, you will see the SMS Booking Reminder dropdown and can select the “24 hours before” option.
If you select the Job Type as “Casual”, you can also send a booking confirmation on job creation as well as 24 hours reminder.
If you select the Job Type as “Regular”, then you won’t see the “SMS on job creation” checkbox but you can select 24 hours reminder for multiple regular jobs you created.
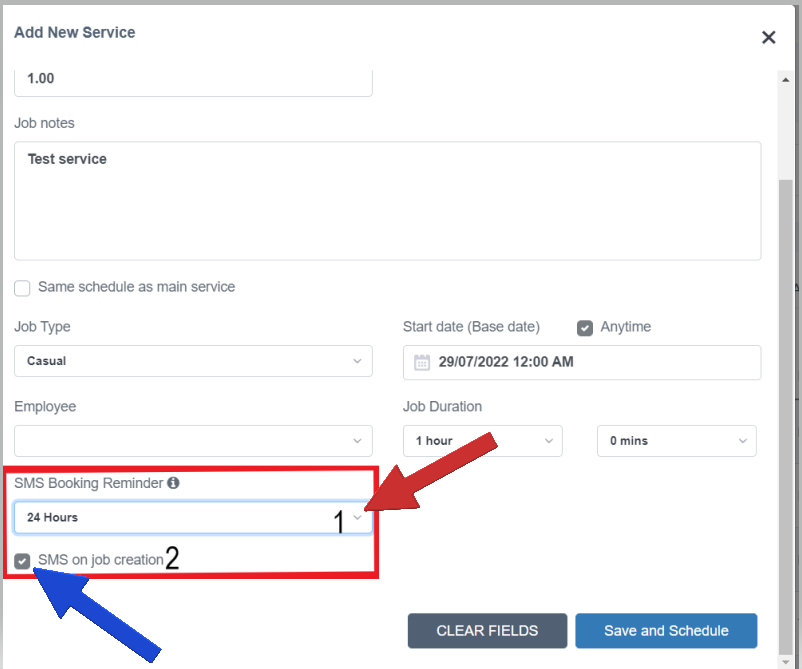
While creating a job, you will be able to send a booking confirmation on job creation by ticking on the “SMS on job creation” checkbox and you will also
be able to select the “24 hours before” SMS reminder option.
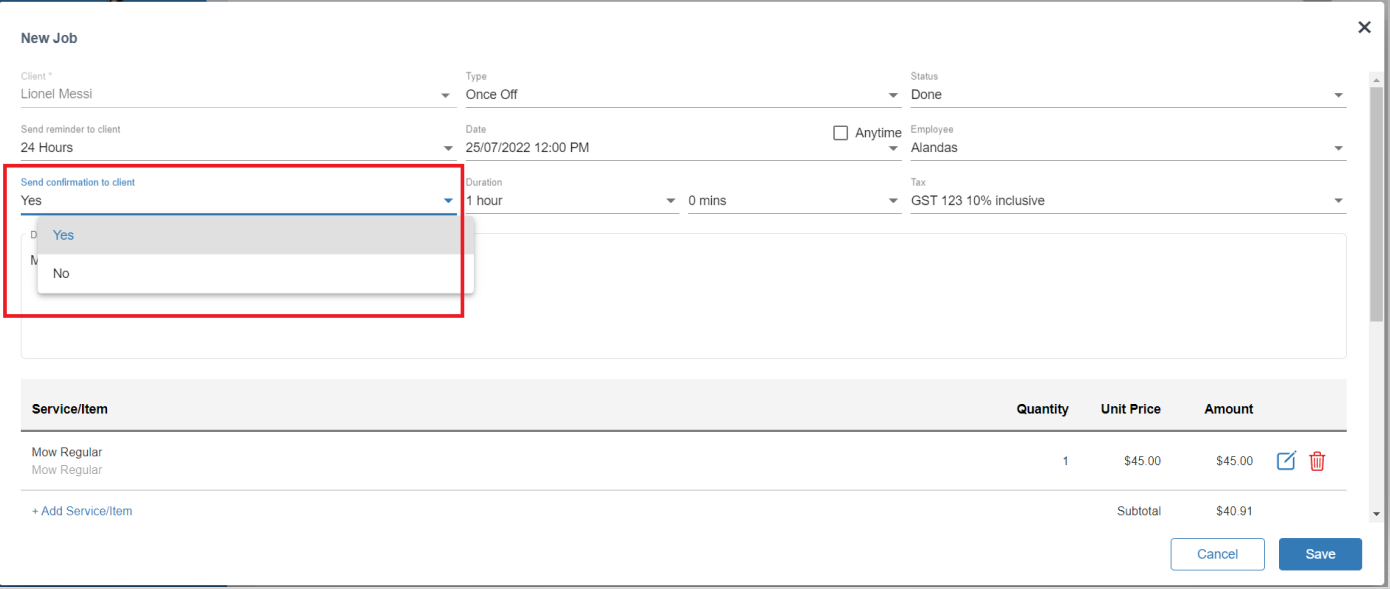
All of your booking confirmation and reminder SMSs will be sent to the clients between 9 AM and 5 PM even if you select your job start time as “Anytime” (midnight).
For example, if you created an Anytime job for 02/03/2021 and set a “24 hours before” booking reminder, then your reminder SMS will be sent to the client between 9 AM and 5 PM on 01/03/2021.
Scheduling the Services
To schedule the services for a Client, click the Create Schedule Based Services button. Jim’s Jobs will provide a confirmation message when the jobs have been scheduled.
You can check that Jobs are scheduled correctly by looking at the Future Jobs tab.
Details
You can specify how you want to bill the client, by going to the Details tab of a Client. This area contains information about who you want to address the billing invoice to, how much money the client owes you, as well as information for work-cover clients.
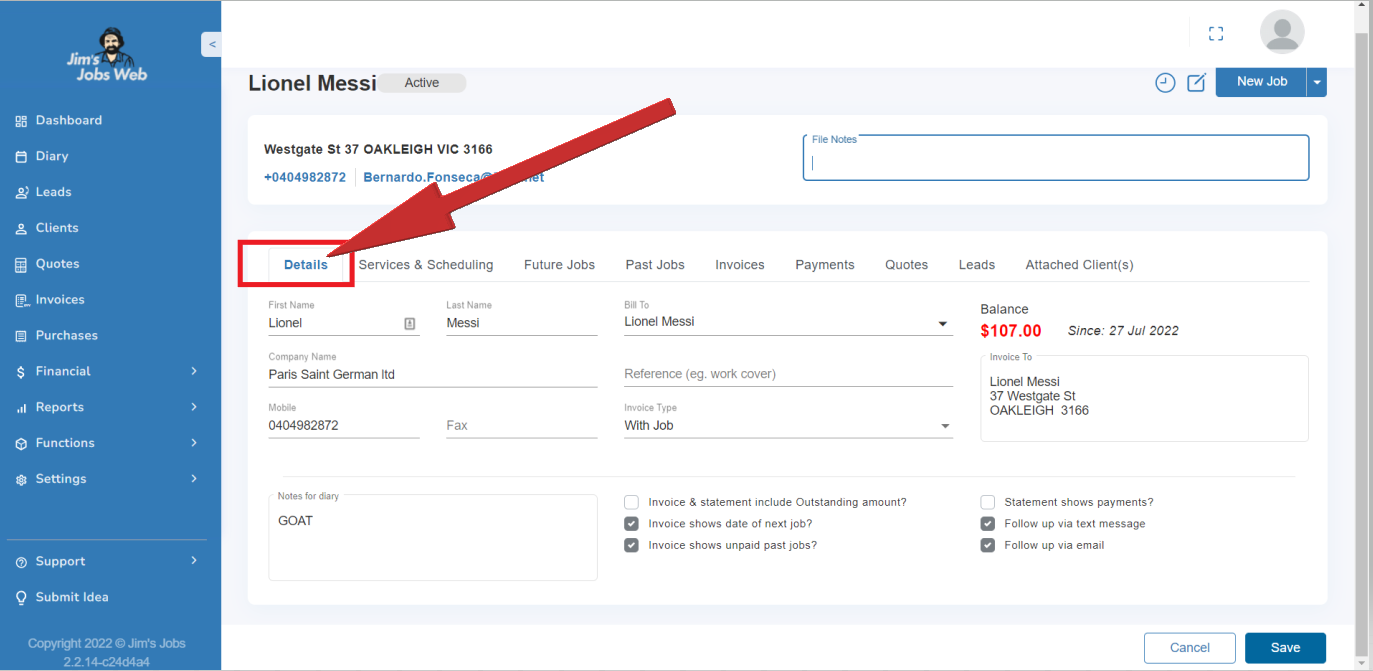
Most of the time, you will give the billing invoice to the same person you are servicing, and thus you will want to specify Bill’s same address. Invoices generated will be addressed to that address.
You can choose to bill on a “with job” basis (that is one invoice for each job you do), or, you can bill on a monthly basis (one invoice per month, with all the services on the same invoice.)
Sometimes, however, you will be servicing one address, but billing a different address. If this is the case, you can select Bill’s existing address or Bill a new address.
(If you already have the billing address recorded in the system somewhere, you can select Bill as an existing address. Then you can select the address you want to bill by selecting the appropriate client in the drop-down box. If you have never entered it previously, select Bill a new address instead and you will be able to enter the details of the new billing address).
Note:
- For work cover clients, specify the work cover company’s address as the address to the bill, and then you can enter the claim number of the client underneath. This number will be printed on the invoices.
- If there were invoices imported that have been created for payment records without any invoice. They will get -1 as the invoice number so you can distinguish them.
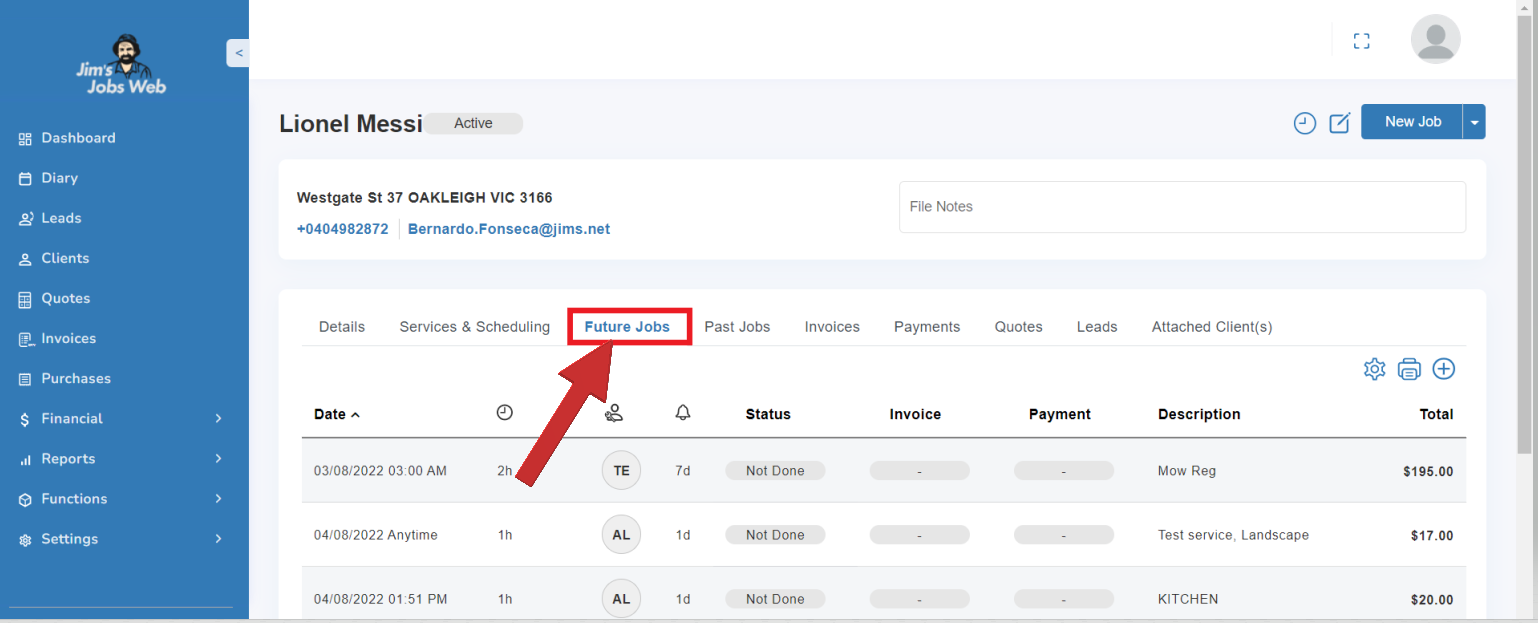
Future Jobs
All information about a client’s regular and casual work future schedule is accessed through the Clients screen under Future jobs.
Work is scheduled typically for the next couple of months – e.g. 60 days, or as specified in the Miscellaneous Settings (No. of days to auto-schedule ahead).
Future Jobs include any Job that is Job Not Done and is for today or a future date.
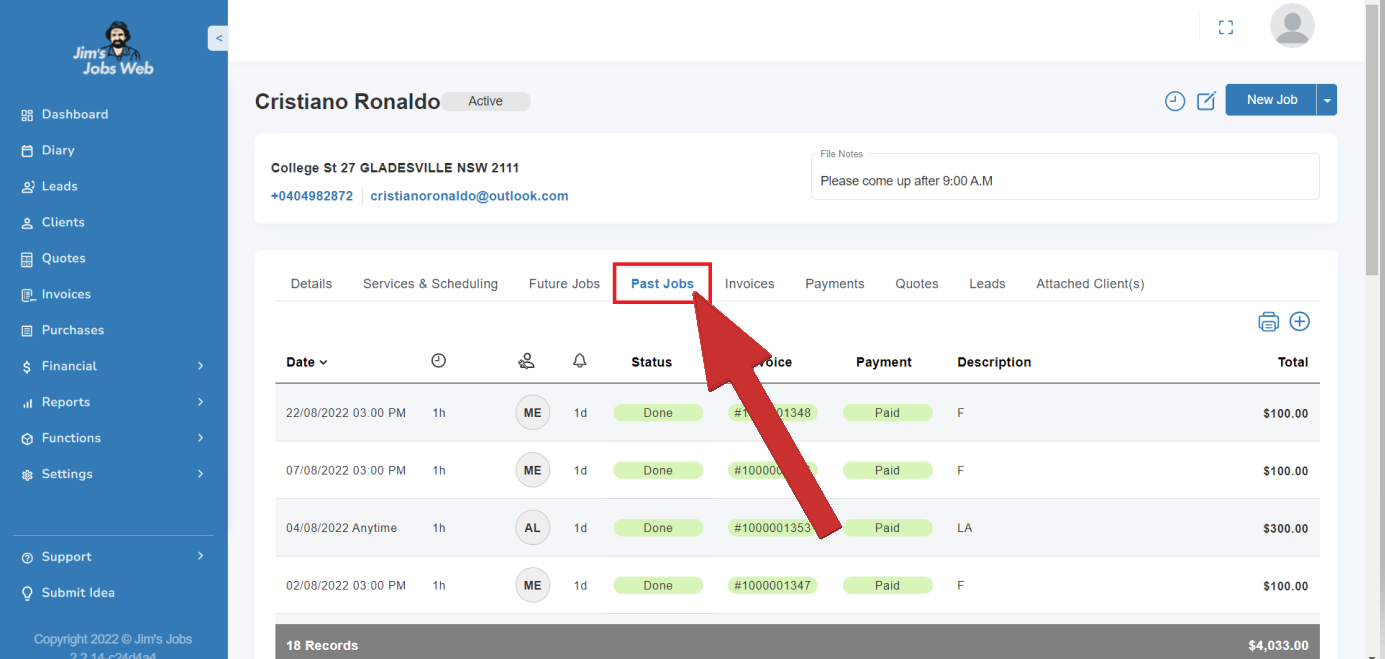
Past Jobs
Information about a client’s previously serviced work schedule is accessed through the Clients screen under Past jobs.
Past Jobs include any Job that has been Cancelled, Done – as well as Job Not Done where the date is today or in the past.
Invoices
Information about a client’s recent invoicing history is accessed through the Clients screen under Invoices.
You can also add in an Invoice here unless the client has a different billing address.
If a client has a different billing address (see Billing details), then the client’s invoices will be attached to the Billing Address client.
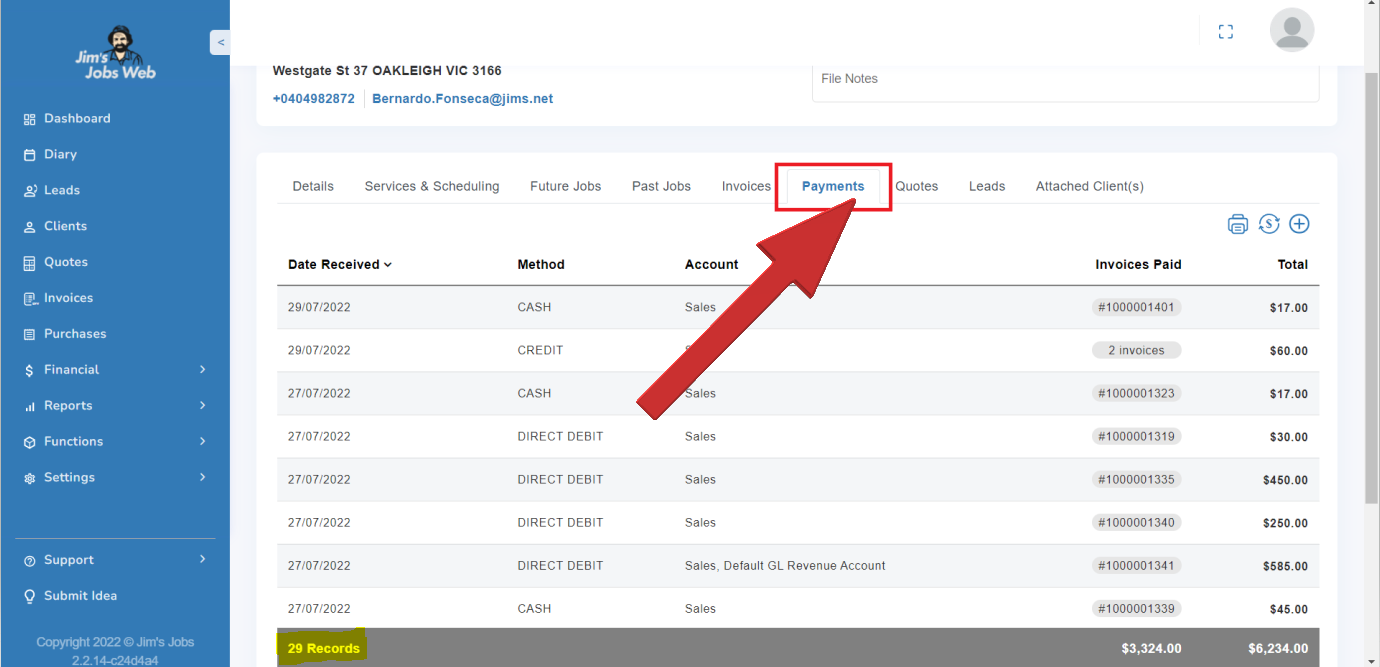
Payments
Information about a client’s recent payment history is accessed through the Clients Screen under Payments. There is a record of all payments made.
You can add in a Payment here, and attach Jobs to the payment record unless the client has a different billing address.
If a client has a different billing address (see details), then the client’s payments will need to be made via the Billing Address client.
Attached Clients
Information about the linked clients (i.e. Corporate, Real Estate, or multiple property owners) can be accessed through the Clients screen under Attached clients.
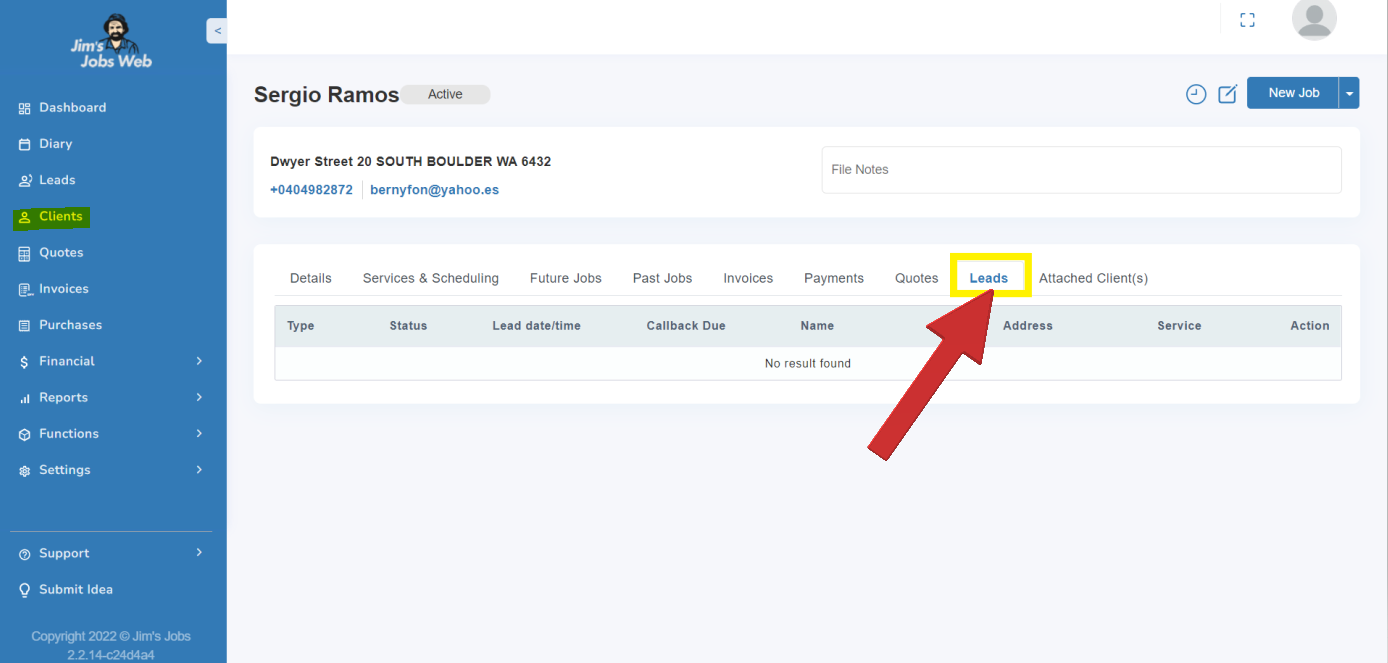
Leads
Leads from your client that were previously received from Jim’s Group can be accessed via the Leads tab on a Client.
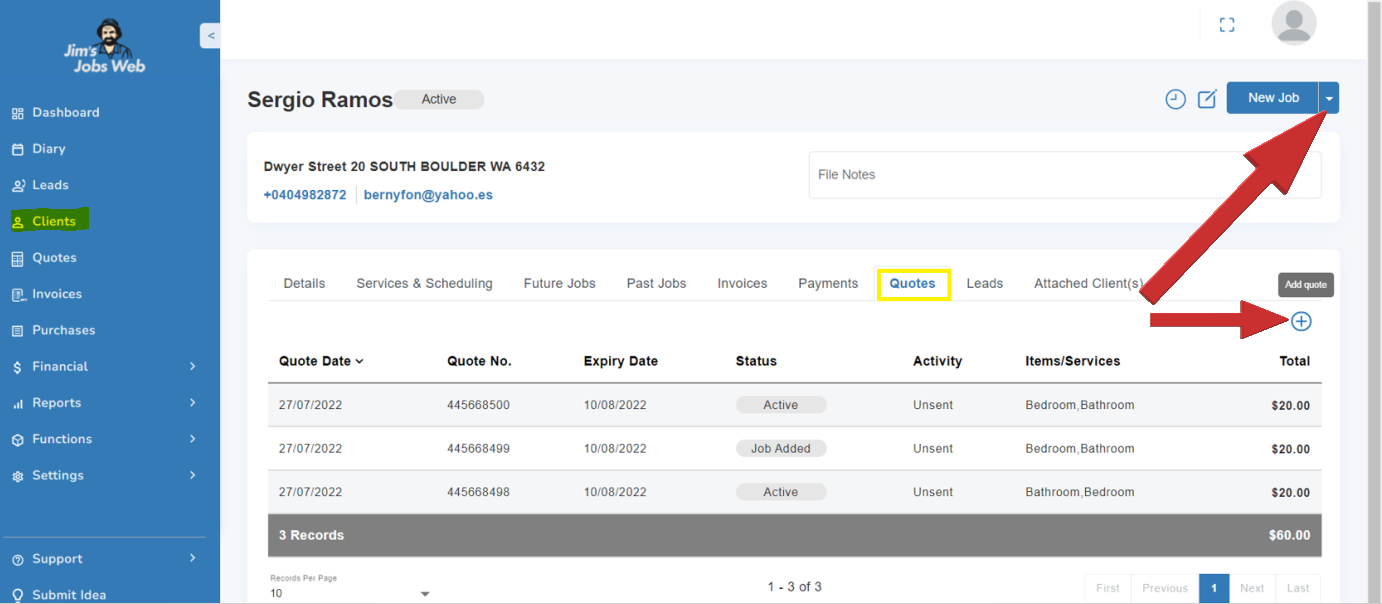
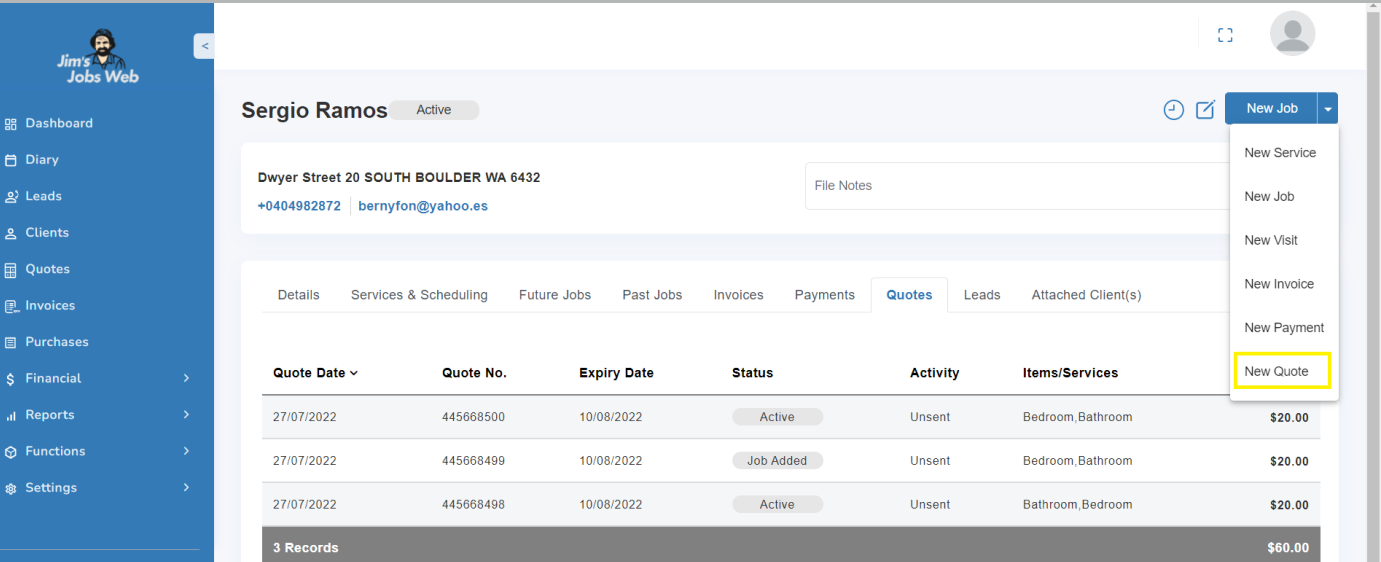
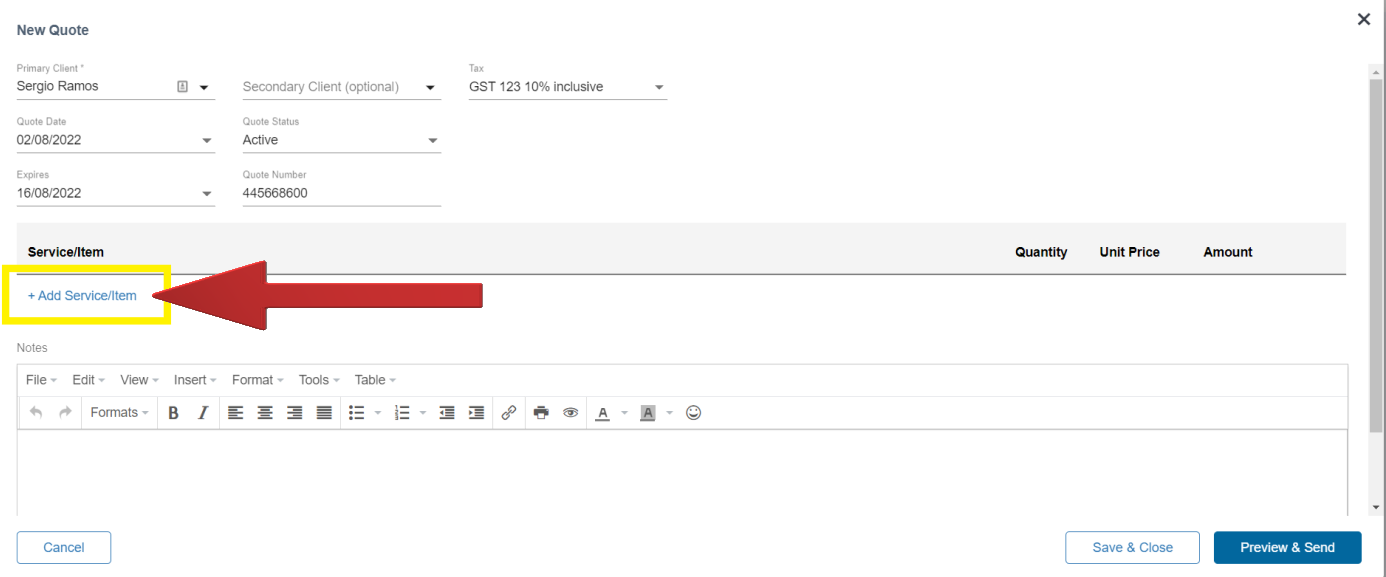
Quotes
Quotes for the client can be accessed through the Clients screen under the Quotes button. New Quotes can be added via ‘+’ or from the New Job button click on the arrow